the orange-iest salad + an article

blood orange and sweet potato salad

Today I’ve got something I’m very excited to share with you: a recipe to go along with my article that appears in Chickpea’s new Winter 2013 edition! Haven’t heard of Chickpea? It’s the sweetest vegetarian and vegan quarterly floating around – gorgeous photos, writing and so many amazing ideas! I’m so grateful and excited to be involved. If you like, you can grab a copy in their online store (for now, only the digital copy is available, but the print version should be out soon!).

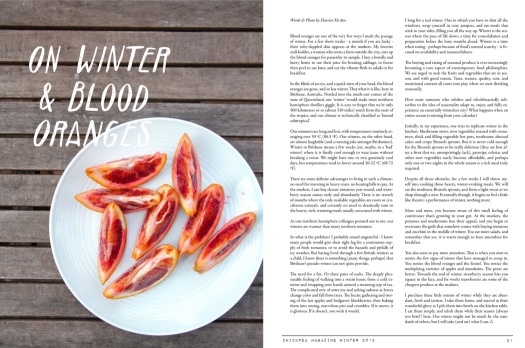
I won’t spoil the gist of my article for you, but it’s a very Harriet-style musing on winter. When I started thinking about this piece, I really asked myself what signifies winter to me – what evokes its shorter days and cooler nights? Blood oranges immediately came to mind – they’re one of my favourite fruits, and I love them all the more for their limited season. You appreciate them all the more, I find.

This salad – something I find myself making regularly when blood oranges are in season – is seriously delicious. Filling, flavourful and also a feast of colour for your eyes – just check out all that orange! Need I mention that it’s packed full of nutrients? Probably not (even though it is!).

Wherever in the world you might be, I hope you’re enjoying the change in seasons. Here, winter has gone and we’re heading full-throttle into summer. I’m almost wishing for those cooler days again.

blood oranges
the orange-iest salad
chickpea
blood orange + sweet potato salad w blood orange citronette

serves 4

recipe notes

  • If you’re not sure how to supreme a blood orange, check out the instructions below.

ingredients
for the salad

  • 4 sweet potatoes (900 g / 2 lb)
  • 1 sprig rosemary, leaves removed
  • 2 tbsp olive oil
  • a pinch of sea salt
  • freshly cracked black pepper
  • 1/3 c (45 g) pepitas (pumpkin seeds), toasted
  • 1 c (160 g) cooked cannellini beans (tinned is fine)
  • 2 blood oranges, supremed
  • 4 stems of dill, fronds removed and roughly chopped

for the citronette

  • 1/3 c (80 ml) blood orange juice (from 1 orange)
  • 2 tbsp olive oil
  • a pinch of sea salt
  • freshly cracked black pepper
  • 1/4 – 1/2 tsp apple cider vinegar (to taste)

Preheat your oven to 190 C (375 F) and line an oven tray with parchment paper. Quarter the sweet potatoes lengthwise, then cut into 2 inch segments. In a large bowl, toss sweet potatoes with rosemary leaves, oil, salt and pepper. Spread onto baking tray in a single layer. Place into the oven and roast for 35 minutes, until soft. Allow to cool slightly before assembling the salad.

Meanwhile, make the citronette by combining all the ingredients in a glass jar, seal with a lid and shake to combine (or whisk together in a bowl). Adjust seasoning to taste if necessary.

In a large bowl, combine roasted sweet potato with pepitas, beans, blood orange segments, and dill. Pour over dressing and mix gently to coat. Serve and enjoy.

how to supreme a blood orange

  1. Using a sharp knife, slice off the ends of the blood oranges, to reveal the top of the flesh.
  2. Turn the orange so one of the flat ends is down on the cutting board, and slice between the flesh and the pith, moving around the orange in sections, until the skin and pith is removed.
  3. Pick up the orange, and slide your knife between the membrane and flesh of one segment. Repeat on the other side of that segment, loosing it from the orange.
  4. Repeat step 3, working you way around the orange until all the segments are free from the membrane.

multigrain banana waffles w balsamic strawberries

multigrain banana waffles w balsamic macerated strawberries

Anyone who follows me on Instragram will be well aware of my deep and undying love of smoothie bowls for breakfast. And that certainly is not going to drastically change any time soon, but occasionally a little variety is wanted (and needed). So then enter the waffles.

In the last 6 months, waffle recipes seemed to be everywhere I turned (The First Mess, or Oh, Ladycakes, for instance). My waffle-hunger initiated, I had no way to satisfy my desire for waffles. As, alas, I had no waffle iron! Luckily, my marvellous sister-in-law, Amy, gifted us a waffle iron as a wedding present, and it’s been getting a pretty good work-over ever since.

There is something rather fantastic about a waffle: much more interesting than a pancake, it satisfies you if you’re craving cake, or muffins, or (in this case) banana bread. And: you can reheat them in the toaster. Need I say more?

I almost called these ‘banana bread waffles’ because of their insane similarity in texture to banana bread: they’re thick, and chewy, with the edges getting nice and crisp in the waffle iron. I used a blend of four flours shown in the picture below, l-r: wholemeal spelt, amaranth, quinoa and oat. Which makes these waffles super-powered multigrain waffles! They’re not overly sweet (I save the sweetness for the toppings) but perfect with a little maple syrup.

We had a killer strawberry season this year, which meant that everywhere you turned in my kitchen, strawberries were sneaking their way into our meals. Inspired by my strawberry riches, balsamic-macerated strawberries came to top these waffles. These super flavourful strawbs are all great with a dollop of cashew cream, or coconut yoghurt, and can add sparkle to any porridge.

Wishing you tummies full of waffly-grainy-goodness! X

flour power
amazing strawberries
waffles
multigrain banana waffles
multigrain banana waffles are ready to be eaten

Multigrain Banana Waffles

makes 16 waffles

Recipe notes

  • As I note above, these are not super sweet waffles – if you desire, double the sugar.
  • You can freeze leftover waffles, and reheat them in the oven. Alternatively, store them in the fridge and reheat them in a toaster.

Ingredients

  • 1/2 cup wholemeal spelt flour
  • 1/2 cup amaranth flour
  • 1/2 cup quinoa flour
  • 1/2 cup oat flour
  • 1/2 cup flaxmeal (ground flaxseeds)
  • 1 tsp baking powder
  • 1/4 cup raw sugar
  • 1 tsp cinnamon
  • 1 + 1/3 cup almond milk
  • 2/3 cup mashed banana (2 medium bananas)
  • 1 tsp vanilla extract

In a large bowl, combine flours, flaxmeal, baking powder, sugar and cinnamon. Whisk thoroughly to combine. In a separate bowl, mix together almond milk, mashed banana and vanilla. Add wet to dry, whisking to combine.

Heat waffle iron or maker and prepare waffles, using about one heaped dessert spoon of batter per waffle, according to manufacturer’s instructions.

Meanwhile, prepare the strawberries.

Once all the waffles are cooked, serve with macerated strawberries (don’t forget a spoonful of those amazing juices!), a sprinkle of flaked almonds, and maple syrup, if desired.

Balsamic Macerated Strawberries

makes about 2 cups

Recipe notes

  • These are delicious over almost anything (yoghurt, icecream, granola, porridge).

Ingredients

  • 250 g (1/2 lb) fresh strawberries, hulled and quartered
  • 1 tbsp raw sugar
  • 1/2 tsp balsamic vinegar

Combine all ingredients in a bowl, stirring to coat the strawberries in the sugar. Leave to macerate for 30 minutes or so, stirring occasionally. Refrigerate if not using immediately.

almond + chickpea felafels

almond + chickpea felafel

Ok, so you’re getting into the healthier side of things. You’ve started making your own nut milk (Yay you! That’s awesome!), which is pretty rad. But the sight of all that nut pulp going to waste hurts your inner-recycling genie. Well have I got the recipe for you: almond and chickpea felafel.

I know the universe has been going a little crazy for nut-based felafels lately, and they’re delicious to be sure. But, I wanted to challenge myself to use that bag of frozen almond pulp that’s been sitting in my freezer for months (because I couldn’t bring myself to throw it away). I’ve tried making nut-hummus (but didn’t fall in love with it) and I’ve even made my own almond meal by drying the pulp slowly in the oven (extremely delicious, but a little time consuming and the meal doesn’t have the shelf life of store-bought versions). So with several felafel ideas doing the laps around my brain, out came these babies. And aren’t they tasty.

And versatile! I threw these on top of salads, Adam put them in sandwiches, and I even popped a couple in my mouth for an afternoon snack. Also – the sauces you could serve these with are endless. How about: garlicky tahini, hummus, pesto, coriander cashew cream, creamy dill dressing, or a chunky tomato relish? There’s a lot you can do with them, and I think that’s a big part of their charm for me!

Need I even mention their stellar protein content? And wonderful fats? Since first making this version, I’ve also done a super herby mix (with loads of parsley, coriander and mint), which also turned out great. These felafels are a blank (but not bland) canvas for you to make your own. If you do, I’d love to hear your take on them!

Big felafel-y love X

in the processor
rolled felafel
felafel time
baked felafels
a simple serving suggestion

Almond and Chickpea Felafels

makes about 12

Recipe notes

  • I’m pretty sure almost any nut pulp would work here in place of almond, but I can’t vouch for them.

Ingredients

  • 1 cup almond nut pulp
  • 1.5 cups cooked chickpeas (canned is fine)
  • 1/2 tsp cumin seeds
  • 1/2 tsp coriander seeds
  • handful of fresh coriander leaves
  • 1/2 red onion, roughly chopped
  • 2 garlic cloves
  • 1 tbsp chia seeds
  • 1/2 tsp chilli flakes
  • 1 tbsp tahini (I used unhulled, but hulled would work fine too)
  • 3 tbsp sesame seeds
  • 1 tbsp nigella seeds
  • sea salt and pepper, to taste

Preheat oven to 175 C (350 F) no fan, and line a baking tray with baking paper. Combine chia seeds with 3 tbsp hot water and whisk to combine. Set aside for 5-10 minutes to form a gel. In a food processor, combine garlic, onion, coriander leaves, cumin seeds and coriander seeds. Process until finely chopped. Add pulp, tahini, chickpeas and chia gel. Season to taste. Process to combine – you may have to scrape down the sides a few times.

In a bowl, combine sesame and nigella seeds. Roll the felafel mixture into balls with your hands, then roll them in the seed mix to coat. Refrigerate for 30 minutes, or until required. Bake for 50-60 minutes, until the felafels are crisp on the outside and golden brown.

banana chai popsicles

banana chai popsicles

Summer is upon us in every sense of the word (sorry to my lovely northern hemisphere readers). It’s hot. It’s humid. It’s almost hard to move around.

As you may have picked up on, I don’t deal well with the heat. Sure, I enjoy the opportunity to lounge around in shorts and breezy dresses, but shit still needs gettin’ done. Trying to pay for lunch out with a friend the other day, it took at least 3 tries before I could work the machine properly. It almost borders on the ridiculous, and there’s probably some room for toughening up on my part. But in lieu of toughening up, here’s how I deal with sky-rocketing temperatures: large volumes of water and iced tea, raw things (I know Adam’s rolling his eyes), and frozen treats. Once the day gets hot, all I want to do is eat watermelon, nap and if I get hungry at all (which I often don’t if it’s super hot) somehow fashion a salad if I can get my brain to work my arm to chop the vegetables.

I’m being horribly melodramatic I know, but it’s hard to feel motivated to do anything when you feel like you need to take your second or third shower for the day, amiright? Here’s where the frozen treats come in (you were wondering about those, I’m sure). I firmly believe that any task to be completed above 30 C (86 F) can be successfully accomplished with one hand, while you lick/bite/suck/enjoy a popsicle with the other. I’m sure it’s a measurable fact. Frozen treats, like these popsicles, always succeed in cooling my body temperature down just enough to make everything seem doable. I highly recommend them the next time you’re in the middle of a heat-induced brain-fuzz or full-blown meltdown.

These popsicles are just sweet enough, creamy enough and flavoursome enough to satisfy everything you could want from a popsicle, without crossing over into the ‘slightly-less-healthy’ category. When you consider that each popsicle is only about 1/3 cup in volume, you can totally justify eating two in a row. Or one after breakfast, and then another after dinner. Whatever floats your popsicle loving boat. I know there’s probably a few people thinking that banana and chai might make a funky combination, but trust me, it’s divine. These little lovelies are almost caramel-tasting. In fact, I think I’m off to grab one out of the freezer right now.

organic chai tea
bananas
chai in the pot
golden beauties
banana chai joy
banana chai popsicles

makes 10 popsicles

recipe notes

  • If you’re not into soy milk, I think you’d be able to get away with cashew milk (the fat content feels pretty similar to me), but I haven’t tried this. Also make sure it’s unsweetened.
  • Feel free to substitute a red/roiboos chai if you prefer, but personally I like the colour the black tea gives to the popsicles.

ingredients

  • 2 bananas
  • 2 c (500 ml) soy milk
  • 1/3 c (80 ml) agave nectar
  • 2 tsp vanilla extract
  • 3 tsp organic black chai tea
  • 1 cinnamon stick

In a small saucepan, over medium heat, whisk together the soy milk, agave and vanilla. Add the tea leaves (I put mine in bag, but you can leave them loose, just strain through a sieve once you’re done) and cinnamon stick. Heat for 10 minutes, stirring until it starts to steam, but do not boil. Cover and allow to cool completely with cinnamon and tea to infuse. Once cool, remove tea and cinnamon stick (with a sieve if necessary). Combine in a blender with the bananas and blend until completely smooth. Pour into popsicle moulds (each should take around 1/3 cup). Place in the freezer for 30 mins, then quickly remove and insert 1 popsicle stick into each mould. Return to freezer for 2-3 hours, until completely frozen. To remove popsicles from mould, run the mould under warm water to loosen the popsicle. Enjoy!

hand food: pumpkin + chickpea samosas and pear pies

samosas and pear pies (made from a wholewheat-spelt pastry)

A few weeks ago, my parents and brother moved house. In and of itself, this isn’t a strange or rare occurrence in our family – we’re definitely gypsies. Moving house is a stressful time, as I’m sure we can all relate to. Your stuff is everywhere, your plates and cooking tools packed away, and you stand around an empty house feeling a bit overwhelmed but excited. Moving into the new house is just as stressful, but equally exciting: finding everything its place, heck, finding you a space!

I’d been helping out here and there, packing boxes and taking things to the new house the week before they moved. But, I decided that for moving day itself, a bit of extra help was needed. The last thing you should be doing during a stressful life event is chowing down on whatever is most convenient, but usually the least of what your body actually needs. I wanted to bring food for moving day that was filling, wholesome, delicious and convenient to eat. Here’s where hand food comes into play. Food that’s easy to transport, eat and enjoy. No cutlery and no plates required. Perfect for a busy day of coordinating removalists, and unpacking boxes. But, you know, equally perfect for picnics, parties, and road trips. Crowd pleasers.

I made a double batch of the best vegan pastry recipe I’ve ever come across: Perfect Vegan Pie Crust from Food52. I made a wholewheat-spelt blend pastry this time, and I went from there. After seeing Laura’s (from The First Mess) strawberry hand pies a couple months back, I decided something similar was definitely on the cards. Instead of strawberries, I opted for the adorably blushing corella pears that had been languishing in my fruit bowl. Now what to do with the other half of the dough? I wanted something savoury – super savoury – and samosas it was!

Now, I know most vegetarians and vegans have had the experience of turning up to a function, cocktail party or other event and being served an oily, greasy lump of pastry stuffed with equally unsatisfying filling. Not these samosas my friends. When Adam tried a samosa, the first thing he asked was that I make the filling again and we eat it with rice like a normal curry. I know I’m probably biased, but that’s how delicious this filling is, truly. The pumpkin almost melts around the chickpeas, and the spices are flavourful without being overpowering.

I arrived for moving day, my bag stuffed with pies and samosas, eager to help in more ways than just moving boxes around. I gave everything a quick reheat in the oven (thought they’re equally fine cold or at room temperature), served them up onto a platter (pulled from a box I’d just unpacked) and watched them disappear. No plates, no forks, and no fuss.

corella pears
pear filling (all the cinnamon)
pumpkin & chickpea filling
pumpkin & chickpea samosa filling
slightly overfull pear pies
workspace
crimped
samosas in progress
pear hand pie
pear pies
pumpkin & chickpea samosa
samosas

Pear Hand Pies

makes about 15

Recipe notes

  • For the pastry, I used 2/3 wholewheat flour, 1/3 wholegrain spelt.
  • Don’t be tempted to overfill – I always remove filling as I’m folding them over – you don’t want your pastry to rip.

Ingredients

  • 1 quantity vegan pie crust
  • 3 medium corella pears, peeled, cored and diced
  • juice of 1/4 lemon
  • 1 tbsp maple syrup
  • 1 tsp ground cinnamon
  • pinch of ground clove
  • pinch of freshly ground nutmeg

Preheat oven to 180 C (355 F) without fan. In a bowl, combine pears with lemon juice, syrup and spices. Stir to combine. Roll out the dough to 0.5 cm (1/4 inch) thick, and using a cookie cutter approximately 4 inches in diameter, cut out circles of pastry and place on a tray. Repeat rolling and cutting until all the dough is used. Spoon a small amount of filling into the centre of each circle (you’ll be able to tell if you’ve overfilled – just remove some and continue). Fold the circle in half, and seal by crimping the edges with a fork. Repeat for remaining pies.

Brush the tops of the pies with the juices that have collected in the bottom of the filling bowl. With a small sharp knife, poke a little hole in the top (this lets steam out during baking). Bake in the oven for 20 minutes, until cooked and lightly golden. Cooled thoroughly, they should keep for 2-3 days in the fridge.

Pumpkin and Chickpea Samosas

makes about 15

Recipe notes

  • See notes above regarding pastry and filling
  • You can prepare these in advance and freeze them, unbaked, until required. Thaw thoroughly first before baking.

Ingredients

  • 1 quantity vegan pie crust
  • 1 tbsp olive oil
  • 1 brown onion, finely diced
  • 2 garlic cloves, minced
  • 1 tsp cumin seeds
  • 1 tsp mustard seeds
  • 250 g pumpkin (peeled and deseeded weight), cut in a small dice
  • 1/2 tsp tumeric
  • 1/2 tsp chilli flakes
  • 1/2 tsp ground cinnamon
  • 1 cup parsley, finely chopped
  • 1 cup cooked chickpes (tinned is fine)
  • sea salt and pepper, to taste

Preheat the oven to 180 C (355 F) without fan. In a large frying pan, heat the olive oil over medium heat. Add the cumin and mustard seeds and fry gently until fragrant. Add the onion and garlic, cooking for 5-10 minutes, until translucent and soft. Add the pumpkin, the rest of the spices and cook, stirring occasionally for 10-15 minutes, until the pumpkin is soft. You may like to add a couple of dashes of water, so the mixture doesn’t stick to the pan. Add the chickpeas and parsley, cooking for a further few minutes. Season to taste. Remove filling from heat and allow to come to room temperature.

Roll out the dough to 0.5 cm (1/4 inch) thick, and using a cookie cutter approximately 4 inches in diameter, cut out circles of pastry and place on a tray. Repeat rolling and cutting until all the dough is used. Spoon a small amount of filling into the centre of each circle (you’ll be able to tell if you’ve overfilled – just remove some and continue). Fold the circle in half, and seal by crimping the edges with a fork. Repeat for remaining samosas. With a small sharp knife, poke a little hole in the top (this lets steam out during baking). Bake in the oven for 20 minutes, until cooked and lightly golden. Cooled thoroughly, they should keep for 2-3 days in the fridge.

stracciatella ice cream

vegan stracciatella icecream

Oh boy, it’s true, I inherited an ice cream maker. Readers, gird your loins for an influx of recipes for ice creams, sorbets, and all manner of delicious frozen delights. I’ve got a raspberry-cashew idea floating around, along with a hankering for something rich and chocolatey. I knew as soon as I had my eager hands on that ice cream maker (kindly given by Adam’s parents, who weren’t using it), that stracciatella ice cream would be high on my list of priorities.

My trip to Venice just over two years ago is largely dominated by memories of all the gelati I ate. Which was a lot. Four scoops a day? I’m not even lying. It was truly excessive. But delicious. There was lemon, and 70% chocolate, and watermelon, and hazelnut, and strawberry. Served to you, at my favourite gelateria, by a man who my friends and I christened ‘Hot Nasty’ (he was incredibly gorgeous, but slightly surly). But my favourite gelato flavour, guaranteed to be nestled in beside whatever other flavour I was trying, was stracciatella.

You see, the thing is, I’m a vanilla girl. Not that I don’t love chocolate (I really do). But, if you held a gun to my head and said that I had to pick between vanilla and chocolate for the rest of my life, I’d pick vanilla. Hands down. (What would you pick? I’d love to know!) Stracciatella combines, for me, the best of both worlds. It’s vanilla-y and creamy soft, with flecks of dark chocolate smattered throughout. Bliss (if you eat dairy, which I was at the time). Now, I return to Australia, after a dreamy (but hectic trip) and what do I find? That all stracciatella versions I come across are missing something, something subtle, something delicious. I ponder (for a long time). Then, serendipitously, one night at our favourite pizza place, the waiter tells us their gelato flavours that night: vanilla, strawberry, and stracciatella. “Which is vanilla, with flecks of dark chocolate and roasted almonds,” she tells us, in no way understanding the breakthrough she’d just thrown me into. Needless to say, Adam ordered some and I snuck a mouthful (we’re still in the dairy-days here).

And there it was, the something that was missing: toasted almonds. But without any crunch or hint as to their existence. And that really is the secret – grinding them to form a ‘dust.’ So as soon as that ice cream maker was in my kitchen, I knew a vegan-friendly stracciatella was on its way. It’s made on a base of coconut milk, sweetened with maple syrup, and flavoured with what you might think is almost too-much vanilla. It’s silky and smooth without being rich. With the toasted almond and cacao nibs ground to a coarse dust, that ‘oh-my-what-is-in-this?’ feeling is retained. This stracciatella has a depth of flavour that makes me so very happy, recalling memories of a wonderful trip, and the city and people which made it so special. Buon Appetito!

the only coconut milk to use
vanilla bean
sprinkles of cacao nibs
roasted almonds + cacao nibs
almond and cacao dust
stracciatella waves
stracciatella w roasted almonds and cacao nibs
stracciatella ice cream

makes about 750 ml

recipe notes

  • You will make more of the almond-cacao dust than you need for this recipe, but fear not! You’ve just created something that is great as a topping on smoothies, granola, oats and probably even waffles. Store in an airtight container.
  • If you’re not keen on cacao nibs, you could use dark chocolate chips instead (but I haven’t tried this). Blitz them along with the cooled almonds, but be careful they don’t melt everywhere.
  • You could also use agave instead of maple syrup, but personally I enjoy the flavour which maple adds..

ingredients

  • 2 c (500 ml) full-fat coconut milk
  • 1 c (250 ml) water
  • 1/3 c (80 ml) maple syrup
  • 1/2 vanilla bean, seeds scraped out
  • 1 tsp vanilla extract
  • 1/2 tsp xanthan gum
  • 2 tbsp cacao nibs
  • 2 tbsp flaked almonds, toasted

In a saucepan, over medium heat, combine coconut milk, water, maple syrup, vanilla seeds, extract and xanthan gum. Whisk to combine. Continue to heat, whisking regularly (so the bottom doesn’t burn) for 10 minutes, or until it comes to the boil. Once it reaches boiling, immediately remove from the heat and allow to cool completely before proceeding.

While the mixture is cooling, combine the toasted almonds and cacao nibs in a coffee grinder or food processor, and blitz them for ten seconds or so, so form a coarse ‘dust.’ Once the liquid has cooled, add to your ice cream maker and follow the manufacturer’s instructions. Once everything is moving about, add 2 tbsp of the almond-cacao dust. When finished, store in an airtight container in the freezer. Allow to thaw for 10-15 minutes before serving.

spelt + oat soda bread w maple-vanilla berry compote

morning snack

The morning I prepared and shot this post, I was on something like a wave of inspiration and very good vibes. Along with this post, I prepared and shot two others. It was a very good morning. I was in my little cooking-vibe, jamming away in my kitchen while Adam snoozed in bed, and coming up with some delicious results. Also the light was insane (see the last photo of this post – amazing, albeit not my usual style).

Sadly, my day did not continue so well. After a glorious morning of kitchen (and photo, I think) success, sitting down at a desk to read metaphysical philosophy (screw you, Hegel) is a big come down. Some days it’s fine, but others it most certainly is not. I struggled through for a few hours before falling into a decidedly awful existential crisis at lunch. “Why do I spend my time on something that makes me so unhappy? Why am I ruining my back sitting at a desk? What am I doing with my life?! Why can’t I cook and take photos and cook all day?” In other words, a little self-indulgent funk.

This happens every now and then, and I’m usually inconsolable and horribly grumpy for a few hours. It ain’t pretty folks. Anyway, this time I worked through it. Alternating 30 minutes of Hegel with 30 minutes of photo-editing, and I got through. Sometimes working through it is what works, other times it’s a walk, or the gym, or throwing in the towel and watching documentaries in bed for the rest of the day. No judgement.

Sitting there afterwords, in the cool and quiet almost-dusk light, my little funk seemed very far away and a little silly. And I can look at the photos from that morning, and the delicious food ready to be eaten, and it makes me really happy. Just like that. This bread, friends, is a happy-making bread. My go-to soda bread recipe (one that doesn’t taste only like bicarb soda – my number complaint of most soda breads), based off this recipe from 101 Cookbooks, that I’ve altered to make it vegan. I’m thrilled to share with you.

Straight out of the oven this bread is fragrant and soft with the crunchiest crust (although a bit tricky to slice). A few hours later the crust has softened a little, the flavours of nutty spelt and oatey oats have developed. The next morning it makes sensational toast. Especially if you slather it with some maple-vanilla berry compote. Or not (this bread is equally satisfactory when dunked in soups).

Berry compote is a condiment on regular rotation in our house. Adam has it on yoghurt, or we cut up some fresh fruit and top with granola and compote for a quick (and healthy) dessert. This time I’ve thrown in a used vanilla bean (i.e. I’ve already scraped out the seeds for another use), and it made a wonderful addition. I use any berries I have on hand, and frozen berries work just as well too. Soda bread and compote speaks to me of lazy weekends, sleepy mornings filled with tea, tranquility and some calm. Enjoy!

ready for the oven
berries
maple-vanilla berry compote
spelt and oat soda bread with maple-vanilla berry compote
spelt and oat soda bread
soda bread + berry compote
soda bread with berry compote
morning sun

Spelt and Oat Soda Bread

makes one loaf

Recipe notes

  • If you’re not making this vegan, substitute the almond milk and vinegar for 1 3/4 cups buttermilk, like in the original recipe.
  • Top with any seeds you like – I’ve used sesame and nigella here, but pumpkin, sunflower and poppy would all be lovely.
  • You can buy pre-ground oats if you like, but I just grind them for use in my coffee grinder. Whatever is easiest for you!

Ingredients

  • 1 3/4 cups almond milk, unsweetened
  • 1 tbsp apple cider vinegar
  • 2 cups rolled oats, ground fine
  • 2 1/4 cups wholemeal spelt flour
  • 2 tsp bicarb soda
  • pinch of sea salt
  • 1 tbsp seeds, for top

Preheat oven to 200 C (400 F) without fan. Line an 8 cup loaf tin with baking paper. In a small bowl, mix almond milk and vinegar and set aside for 5 minutes until thick and curdled.

In a large bowl, combine ground oats, spelt flour, bicarb and salt, mixing thoroughly. Stir in almond milk mixture (reserve 1 tbsp before mixing), working until a loose dough forms, then knead until it all comes together without cracks – about 1 minute. Form the dough into a cylinder shape by rolling it a few times, then lift into the tin. With a small sharp knife, make cuts in the top of the dough – this improves both the rise and the crust you’ll get. Brush the top with the reserved almond milk and sprinkle with seeds. Bake in the middle of the oven for 50 minutes.

Remove from the oven, and allow to cool in the tin for a few minutes before removing and letting cool completely on a wire rack. Stored in an airtight container at room temperature (or in the fridge) it should last 2-3 days.

Maple-Vanilla Berry Compote

makes about 1 cup

Recipe notes

  • Feel free to use whatever berries you have on hand. Here I’ve used frozen blueberries, raspberries and blackberries. But almost any berry would work!
  • Don’t be tempted to cook the compote until it’s really thick – it continues to thicken as it cools, and you want a spreadable consistency, not toffee.
  • I’m constantly finding new uses for this compote – I’d love to hear your favourites!

Ingredients

  • 1.5 cups of berries (blueberries, raspberries, strawberries, red currants, blackberries)
  • 1 used vanilla pod
  • 2 tbsp maple syrup
  • 1.5 tbsp lemon juice

Combine all ingredients in a small saucepan over medium heat. Bring to boil, stirring occasionally. Simmer for 10-15 minutes, until the berries have mostly lost their shape and the compote has thickened. Pour into a clean glass jar. Stored in the fridge, this compote should last 1 week.

massaged kale salad w a maple-lemon truffle dressing

massaged kale salad w strawberries, tomatoes + maple-lemon-truffle dressing

The salad screams of the transition between winter and summer. The kale is still going strong at the markets, which are also flush with strawberries (though it’s almost the end of strawberry season…sniff) and tomatoes. What better than to combine them into a massive, delicious kale salad? Nothing, dear reader, could be better than that.

This is a picnic-friendly, make-ahead, forget-about-it-in-the-frigde-for-a-few-hours kind of salad. It actually gets better the longer you leave it sitting in its own dressing (a rare beauty in the salad game). After a little while, the strawberries and tomatoes start to release their juices, enhancing the already kick-ass dressing, which by itself is zingy and light, with a touch of I-don’t-know-what thanks to the truffle oil. The almonds are toasty and crunchy, throwing their nutty, roasted flavour profile in the mix.

I took this salad to a birthday-picnic this past weekend, and perhaps it’s just my ego (a little), but this sturdy salad seemed to go down a treat. It makes a lot, and is definitely a salad to share. Need I mention the sheer physical joy of massaging kale? You may feel a little weird at first, but kale needs love (like everything), and getting your hands in there is the best way to go about it. After its massage, and a few hours marinating? macerating? (what verb to use?!), the kale softens and becomes silky, with the dressing clinging to all its nooks and crannies.

I think I’m going to be eating riffs on this salad all summer long. It’s simple and easy to make, but incredibly to both look at and taste. My sort of food. I’m already craving the next one. Enjoy! x

curly kale
torn kale leaves
tomatoes
the pinkest strawberries
strawberries + tomatoes
fresh mint
the salad of spring
massaged kale salad

massaged kale salad with maple-lemon truffle dressing

serves 6-8

recipe notes

  • If you don’t have truffle oil, don’t worry! Use regular olive oil, and it will still taste great.
  • If you’ve got basil instead of mint, feel free to substitute! I hand mint on hand, so used it.
  • I can’t stress enough how the kale really needs a decent massage here. Don’t be meek. Scrunch, rub, and crinkle it into a massaged glory.

for the salad

  • 1 bunch (3 stems) curly kale, stems removed
  • 1/3 cup flaked almonds, toasted
  • 250 g (just over 1/2 lb) fresh strawberries, hulled and halved
  • 320 g (about 5 smallish) tomatoes, sliced into bite-size wedges
  • 1/2 cup packed mint leaves, roughly chopped
  • 1/4 cup spring onions, finely sliced

for the dressing

  • 1 tbsp maple syrup
  • juice of 1 lemon
  • 2 tbsp truffle oil
  • pinch of sea salt
  • lots (about 1/2 tsp) freshly cracked black pepper

To make the dressing, combine all ingredients in a jar and shake, or mix in a small bowl. Tear the kale leaves into bite-size pieces, similar in size to the halved strawberries. In a large bowl, combine the dressing and torn kale. With your hands, massage dressing into kale leaves for at least one minute, preferably a couple more.

Add the rest of the salad ingredients to the bowl and stir (with your hands or spoon, whatever) to combine. Here, I usually add even more black pepper, but – up to you.Refrigerate until required, but eat the same day.

quinoa-amaranth flatbreads w garlic and dill

quinoa-amaranth flatbreads w dill and garlic

We eat a lot of curry in our household. At least once or twice a week, you’ll find a vast pot of curry simmering on the stove, enough for that night’s dinner with a few servings left over. For me, one of the most challenging aspects of cooking is cooking for another person. Don’t get me wrong: Adam is wonderful, and will try everything I cook (even really weird stuff and things I think are total failures), usually with a smile and a lovely compliment.

Occasionally though, I know my ways of cooking wear a little thin for him, and that he wants something comfortable, comforting and warm with a particular kind of familiarity (don’t we all sometimes?). My solution, you’ve probably guessed, is a curry.

But this isn’t a post about curry. It’s about these flatbreads. Which are utterly and totally delicious. Because who says you can’t have comforting, familiar curry AND something new at the same time? No one. Ever.

My first try at these was quickly one night as a friend was on their way over for a curry-and-movie night (yes, these do exist, and they’re wonderful). I tried frying them in a little olive oil, and while delicious, were very crispy and brittle. After some research in one of the best Indian vegetarian cookbooks I’ve come across, Prashad, I settled on a new method – using warm water to mix, and dry frying.

Bonus! Dry frying these flatbreads catapults them into very health-friendly territory, while still being very very tasty. I’ve flavoured them with garlic and dill, but there are just SO many possibilities here: cumin seed-garlic, coriander-chilli, rosemary-garlic. On and on it goes. I can already tell that they’ll be on regular rotation.

Lastly, these are fabulous with curry (any sort will do – how about a sweet potato jalfrezi?), but, cut into triangles, would jazz up any antipasti platter out there. Swathed in hummus? Or pesto? Versatility is their middle name.

mixing in dill and garlic
dill, dough and quinoa flour
stacked
quinoa-amaranth flatbreads
flatbreads

Quinoa-Amaranth Flatbreads with Garlic and Dill

makes 4

Recipe notes

  • As I mentioned above, feel free to play with the flavours, and uses for these flatbreads! They’d be awesome next to a salad, or topped with hummus, or cut into triangles and served with various antipasti.
  • Don’t be tempted to roll the dough super thin – stick to 1/4 in (0.5 cm) – it is a crumbly dough, so if it’s too thin will be likely to fall apart in the frying pan.
  • Did I mention they’re super quick to make? And can be made ahead?

Ingredients

  • 1/2 c (60 g) quinoa flour
  • 1/2 c (60 g) amaranth flour
  • 1/2 c (125 ml) hot water (boil the kettle just before you start)
  • 1 fat garlic clove, minced
  • 1 tbsp chopped dill

In a medium sized bowl, combine flours, garlic and dill. Add the hot water and mix quickly, until a solid ball of dough forms.

Divide the dough into four sections, and with a rolling pin on a floured surface, roll each section to approximately 15 cm in diameter and 1/4 inch thick. Stack with baking paper in between layers while you roll out the rest.

Heat a frying pan on medium-high. Gently place (perhaps using an egg-flip or spatula) a roll-outed flatbread and dry-fry for 2 minutes or so before flipping and cooking for a further 2 minutes. The dough should have gained some colour and smell fragrant. Repeat for the remaining flatbreads.

If not using the flatbreads immediately, store in an air-tight container in the fridge. Reheat over medium heat for a couple of minutes on either side and enjoy!

blood orange, garlic and coriander marinated olives

marinated sicilian olives

Our favourite pizza place, Vespa Pizza, not only does the tastiest wood-fired gluten-free vegan pizza I’ve ever tasted (guys, it has hummus on it, need I say more?), but their starter menu is pretty damn rad as well. It features smashed kipfler potatoes, a delicious tomato salad, and marinated olives. This is my take on those olives, using rosemary, garlic, coriander seeds and blood orange peel.

Winter, in Brisbane, passes in the blink of an eye if you’re not careful. A few weeks of cool weather (by cool, I mean 20C/68F), and then it’s over, really. One of the ways I really notice winter is at the markets, and a few weeks ago the blood oranges had come in. I bought a massive bagful and came home plotting how to use them. A good deal of them went into making braised red cabbage but knowing that I didn’t want to waste the delicious and beautiful peel, I removed it from two of the oranges, and have them nicely tucked away in the freezer. For occasions when just a little something more is needed.

I’ve solely used these nutty, green Sicilian olives in this version, though it works great with a combination of olives (Vespa does Sicilian, large green olives, and tiny Kalamatas). It’s excellent dinner-party food, and can be made in advance (up to two days, maybe?), then reheated when you’re ready. They’re also perfect as part of a tapas-style spread, and that’s how I enjoy them most, with lots of other little dishes. Good practice for a long summer of lighter, easy eating ahead.

In other news, as the days get longer and warmer, I can feel the pace of the year picking up at a scary rate. Adam and I are both in marking mode at the moment, with exams and essays piled around our study. There’s still a lot to be squeezed out of this year (four papers to present, two chapters to write), and I’m almost counting the days until our commitments wind up and we can enjoy a month or two of a slower pace. Keeping this space helps me retain a piece of my sanity, and keeps the things that matter most to me in sight. Thanks for being here and sharing with me.

sicilian olives
marinating ingredients
rosemary, garlic, blood orange peel and coriander seeds
blood orange zest
marinated olives

Blood Orange, Garlic and Coriander Marinated Olives

makes about 1.5 cups

Recipe notes

  • If you don’t have blood oranges lying around, you could easily substitute regular orange peel, or lemon peel, quite happily.
  • As I mentioned above, these can be made well in advance and reheated whenever you need them.
  • Don’t throw out the flavoured oil once you’re done guzzling the olives! Keep it in a jar and use for delicious dressings, or use it to roast vegetables.

Ingredients

  • 150 g olives (I used Sicilian)
  • 2 garlic cloves, crushed slightly with the back of your knife
  • 3 small sprigs fresh rosemary
  • 1 tsp coriander seeds
  • 3 strips blood orange zest
  • 1/3 cup extra virgin olive oil

In a small saucepan, combine all the ingredients. Heat over medium-low for 15-20 minutes. You want everything to be warm and sizzling a little bit, but you don’t want the garlic or rosemary to burn.

If not using immediately, transfer to a storage container and store in the fridge. For the most flavourful results, storing them for 24 hours is ideal, but they’ll still be great straight away. Reheat over medium when required, and serve warm.